Contact us
Location Pin Deliver to: 43201
Your Shopping Cart
Back

Kitchen backsplash

How to DIY a Kitchen Backsplash in 5 Easy Steps

Published on May 4, 2025

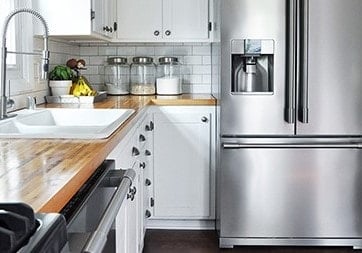
Creating a DIY backsplash is a simple way to add a bit of style to your kitchen while also protecting the walls from spills and stains. You can make your own backsplash in five simple steps.

Step 1: Select your tile
Find the shape and color of the tile that fits your space. Working with sheets of tile, rather than individual tiles, will be easier and faster to install.
undefined
Step 2: Hang backer board
Use a backer board to create a smooth surface to apply your tiles to. If you are applying to a new dry wall, you can sand it first to roughen it up, and apply tile right to the dry wall.
Kitchen backsplash setup step 2
Step 3: Apply tile and insert spacers
Use a notched trowel to apply mastic on the wall. For hard-to-reach corners, use a smaller trowel and back butter the tiles. Start in the center, press a tile sheet into the wall, and work outward, using spacers to maintain even gaps between tiles.
Step 3 kitchen backsplash
Step 4: Custom cut tile
Measure and mark the tile with a grease pencil, then cut it using a wet tile saw. Check the fit before applying mastic, then press the tile into place. Let it dry overnight before grouting.
Step 4 kitchen backsplash
Step 5: Apply grout
Check grout and check if sealant is needed. Mix grout with water to a cake batter consistency. Remove spacers and clean tiles with a damp sponge. Apply grout with a rubber trowel, pushing it into gaps. Clean excess grout with a sponge and leave to dry.
Step 5 kitchen backsplash

Need more support? Watch our video on how to DIY a kitchen backsplash install


Be the first to know

Get the latest deals and product updates straight to your inbox.

By submitting this form, I agree to the Terms and Conditions and Privacy Policy.*